The API
In this project series, we’re going to build a REST API that exposes resources related to stocks. In this post, we’re going to precompute our technical SMA indicator for our clients to consume through our API.
You may find the code in the following repository:
So far, we’ve generated a database with roughly 25 million rows of fake ticker data representing stock data from the years 2000 - 2020. We then took this data and computed some indicators such as simple moving averages with various window periods (5, 10, 50, …), in which we will expose via our REST API.
REST API Documentation
This document provides the specification for our hypothetical REST API service. It defines the endpoints, parameters, response data, and response codes. This will define the scope of our project to which our API will conform.
Base URL
- http://localhost/api/v1
Main Endpoints
- /tickers
- /historical/{ticker}
- /indicators/sma/{ticker}
Endpoints
1. Get All Tickers
Request
- URL:
/tickers - Method:
GET - Headers: None
- URL Parameters: None
- Request Body: None
Response
- Status Code:
200 OK - Content-Type:
application/json - Response Body:
[
    "ABCD",
    "EFGH",
    "IJKL",
    ...
]
2. Get Historical Data for a Ticker
Request
-
URL:
/historical/{ticker} -
Method:
GET -
Headers: None
-
URL Parameters:
ticker: (required) The stock ticker symbol (e.g.,AAPLfor Apple Inc.)
-
Query Parameters:
start_date: (optional) The start date for the historical data inYYYY-MM-DDformat.end_date: (optional) The end date for the historical data inYYYY-MM-DDformat.
-
Request Body: None
Response
-
Status Code:
200 OK -
Content-Type:
application/json -
Response Body:
{ "ticker": "ABCD", "data": [ { "date": "2023-01-01", "open": 150.0, "high": 155.0, "low": 149.0, "close": 154.0, "volume": 1000000 } ] } -
Status Code:
404 Not Found -
Content-Type:
application/json -
Response Body:
{
    "message": "not found"
}
3. Get Simple Moving Average (SMA) for a Ticker
Request
-
URL:
/indicators/sma/{ticker} -
Method:
GET -
Headers: None
-
URL Parameters:
ticker: (required) The stock ticker symbol (e.g.,ABCD)
-
Query Parameters:
start_date: (optional) The start date for the SMA data inYYYY-MM-DDformat.end_date: (optional) The end date for the SMA data inYYYY-MM-DDformat.period: (optional) The period for the SMA calculation (e.g.,20for a 20-day SMA).
-
Request Body: None
Response
-
Status Code:
200 OK -
Content-Type:
application/json -
Response Body:
{ "ticker": "ABCD", "data": [ { "date": "2023-01-01", "sma_100": 152.0, "close": 145.00, }, ] } -
Status Code:
404 Not Found -
Content-Type:
application/json -
Response Body:
{
    "error": "not found"
}
Error Codes
This section outlines the standard HTTP error codes used by our REST API and their meanings.
400 Bad Request
The server could not understand the request due to invalid syntax or missing required parameters.
Response Example:
{
    "error": "Bad Request",
    "message": "The 'ticker' parameter is required."
}
404 Not Found
The server can not find the requested resource. This response code means that the server could not find the requested endpoint or resource.
Response Example:
{
    "error": "Not Found",
    "message": "The requested resource was not found."
}
500 Internal Server Error
The server encountered a situation it doesn’t know how to handle. This is a generic error message given when an unexpected condition was encountered.
Response Example:
{
    "error": "Internal Server Error",
    "message": "An unexpected error occurred. Please try again later."
}
Architecture
Let’s start our build by defining some layers to our application. With the API, we’re only focused on the backend server, which a client application will consume. To achieve a clean and maintainable codebase, we will divide our backend into two main layers:
- View Layer
- Service Layer
View Layer
This layer will be responsible for handling incoming client requests and returning the data and response codes. The View Layer will be lightweight and will primarily serve as an interface between the client and the service layer. It will handle the HTTP requests, route them to the appropriate service methods, and format the responses before sending them back to the client.
Key Responsibilities:
- Handling HTTP requests and routing them to appropriate endpoints.
- Returning HTTP response codes and data to the client.
- Validating request parameters and ensuring they are correctly formatted.
- Passing complex business logic and data processing tasks to the Service Layer.
Why Split the View Layer?
By splitting the View Layer, we ensure that our application remains modular and easier to manage. This separation allows for a clear distinction between request handling and business logic, promoting a clean codebase and simplifying debugging and testing processes.
Service Layer
This layer will be responsible for interacting with the database, parsing client requests, and implementing the business logic. The Service Layer will contain the core functionality of the application, including data manipulation, validation, and interactions with other services or data sources.
Key Responsibilities:
- Interacting with the database to perform CRUD (Create, Read, Update, Delete) operations.
- Implementing business logic and rules.
- Parsing and validating client requests.
- Coordinating with other services or external APIs as needed.
Why Split the Service Layer?
The Service Layer encapsulates the business logic and data manipulation, making the application more modular and easier to maintain. By separating the service logic from the View Layer, we can:
- Improve Code Organization: Keep the business logic separate from the request handling logic, making the code easier to read and understand.
- Enhance Testability: Isolate business logic for more straightforward unit testing, without the need to mock HTTP requests and responses.
- Facilitate Reusability: Make the service methods reusable across different parts of the application or even across different applications.
- Simplify Maintenance: Allow developers to make changes to the business logic without affecting the request handling and vice versa.
Example Scenario
Consider a scenario where a client application requests historical stock data. The View Layer will handle the incoming request, validate the input parameters, and pass them to the Service Layer. The Service Layer will then query the database, perform any necessary calculations or data transformations, and return the results to the View Layer, which formats the response and sends it back to the client.
Benefits of a Layered Architecture
- Separation of Concerns: Each layer has a distinct responsibility, making the system more organized and easier to manage.
- Scalability: The architecture can be easily scaled, with new features or layers added without affecting the existing codebase.
- Maintainability: Clear separation between layers allows for easier maintenance and updates, reducing the risk of introducing bugs.
- Flexibility: The layered approach allows for greater flexibility in developing, testing, and deploying different parts of the application independently.
By adopting this layered architecture, we can create a robust, scalable, and maintainable REST API that is easy to develop and extend over time.
The Technology
For the API, we’re going to use Flask, which is a light-weight web framework in Python. We’re also going to use the built-in SQLite database, which you can swap out for whichever database you want. We’re using it here due to its simplicity and quick setup. It’s also handy for creating test cases.
API Overview
Let’s keep this post focused on the API route setup and one view. You can review the code here for more details:
To keep our API organized, we can make use of Flask’s method-based views, where each view, exposing HTTP methods, can be abstracted to a class. For example, our HistoricalView looks like this:
from flask import jsonify, request
from .base import BaseView
from api.errors import DateFormatError, Messages, ResourceNotFound

class HistoricalView(BaseView):
    def get(self, ticker):
        try:
            data = self.service.get_historical_ticker(ticker, params=request.args)
            return jsonify(data), 200
        except ResourceNotFound as e:
            return jsonify({"error": e.message}), 404
        except DateFormatError as e:
            return jsonify({"error": e.message}), 400
        except Exception as e:
            return jsonify({"error": Messages.INTERNAL_SERVER_ERROR}), 500
This view is a clean way to represent the GET method for the following endpoint:
- /historical/string:ticker
- /historical/AABT-fake
If we wanted to support additional HTTP methods, we could do so by creating post, patch, delete, etc., methods on the class. One interesting design choice here is that we’ve abstracted the business logic to a service class (self.service) in which we query the database and format our response. By doing this, we’ve allowed the view to only be concerned with passing query parameters to the service and responding to potential errors raised. This will enable us to test our views more easily since we’ve separated the concerns between layers.
Our service layer is now responsible for querying our database and formatting our data for output.
class HistoricalService(BaseService):
    def get_historical_ticker(self, symbol, params):
        from_date = params.get("from_date", "2000-01-01")
        to_date = params.get("to_date", "2001-01-01")

        from_date = validate_date(from_date)
        to_date = validate_date(to_date)

        historical = (
            self.database.session.query(Ticker)
            .filter(Ticker.symbol == symbol)
            .filter(Ticker.date >= from_date)
            .filter(Ticker.date <= to_date)
            .all()
        )

        if not historical:
            raise ResourceNotFound

        output = {}

        data = []
        for ticker in historical:
            ticker = ticker.to_dict()
            ticker.pop("symbol")
            data.append(ticker)

        output["ticker"] = symbol
        output["data"] = data
        return output
In our service layer, you can see that we interact with our database and historical ticker models. We also handle data formatting by converting the Ticker model to dictionaries for output. In this layer, we want to validate the parameters passed from the view and raise issues that might arise. Since the view layer is responsible for catching them, we may simply raise issues in this layer. By separating the concerns here, we may also test this layer in isolation from the view.
Now that we have a view and service, we need to wire them up to the Flask application with both their respective URLs and their HTTP methods. We can do so by doing the following:
def configure_blueprints(app, database):
    from api.views.historical import HistoricalView
    from api.views.sma import SmaView
    from api.views.ticker import TickerView
    from api.service.historical import HistoricalService
    from api.service.sma import SmaService
    from api.service.ticker import TickerService

    historical_service = HistoricalService(database=database)
    historical_view = HistoricalView.as_view("historical", service=historical_service)
    historical_url = "/api/v1/historical/<string:ticker>"

    sma_service = SmaService(database=database)
    sma_view = SmaView.as_view("sma", service=sma_service)
    sma_url = "/api/v1/indicators/sma/<string:ticker>"

    tickers_service = TickerService(database=database)
    tickers_view = TickerView.as_view("tickers", service=tickers_service)
    tickers_url = "/api/v1/tickers"

    # Register routes with HTTP methods.
    app.add_url_rule(historical_url, view_func=historical_view, methods=["GET"])
    app.add_url_rule(sma_url, view_func=sma_view, methods=["GET"])
    app.add_url_rule(tickers_url, view_func=tickers_view, methods=["GET"])
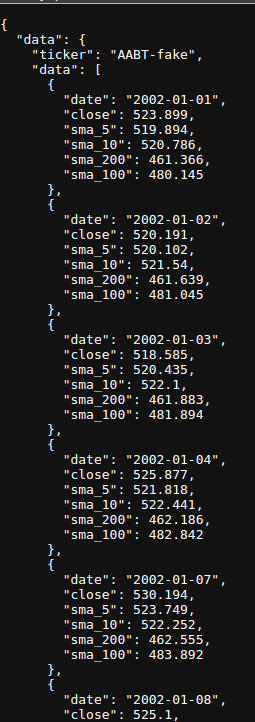
Example Output
- /indicators/sma/AABT-fake?period=5,10,200,100&from_date=2002-01-01&to_date=2003-01-01
Conclusion
By processing our raw ticker data into precomputed indicators, we can create efficient lookup tables that represent resources for our API. These resources may be exposed by a REST API, in which we create predictable URLs for our client applications to consume. We’ve used Flask to create a lightweight REST API in which we’ve created a view layer to handle incoming requests and delegate business logic to a service layer. By creating two layers, we’ve created a flexible way to organize the API and enable us to test it against our documentation. We can also leverage this architecture to handle errors and exceptions more easily by raising exceptions in our service layer and catching them in the view layer.
Next, we’ll review our endpoints and look at why database optimizations are needed and how they impact our service.